When the holiday season arrives, it’s not just about decorating your home or picking out the perfect gifts—it’s also a time to treat yourself to a festive manicure. Holiday nails are a fun and creative way to express the joy and excitement of the season, whether you’re preparing for family gatherings, office parties, or simply embracing the holiday spirit. From traditional red and green designs to sparkling glitter and winter wonderland themes, holiday nails offer endless possibilities for adding a touch of magic to your fingertips. In this article, we’ll explore some of the most popular holiday nail designs, trends, and tips to make sure your nails are as festive as your holiday celebrations.
The Importance of Holiday Nails
Holiday nails aren’t just about aesthetics; they help to elevate your overall holiday look. A well-executed holiday manicure can complement your outfit, make you feel more festive, and even spark conversations. Whether you’re celebrating Christmas, Hanukkah, New Year’s Eve, or any other holiday tradition, a creative nail design can add a personal touch to your festive attire. Plus, it’s a great way to embrace the season without overcommitting to a full-on wardrobe overhaul.
Popular Holiday Nail Colors
When it comes to holiday nails, certain colors are always in demand. Here’s a breakdown of some of the most popular shades and combinations to try this season:
Red and Green
The classic red and green combo never goes out of style during the holidays. These colors are synonymous with Christmas, representing the warmth of the season and the festive spirit. You can choose a rich, deep red paired with emerald green or opt for more modern shades like burgundy or mint green. These hues can be used in various ways—solid colors, ombre gradients, or even as accents alongside other designs.
Sparkling Gold and Silver
Gold and silver are the go-to shades for adding a bit of sparkle and glamour to your holiday nails. Whether you choose a full glitter manicure or accent nails with a metallic finish, gold and silver can give your nails a luxe and festive feel. These colors are perfect for New Year’s Eve celebrations, adding a shimmering touch to any outfit.
Frosty Blues and Whites
For those who prefer a more wintry vibe, frosty blues, silvers, and whites are perfect choices. These colors evoke the feeling of snow-covered landscapes, icy wonderlands, and cozy winter nights. You can experiment with ombre designs, snowflakes, or even add some glitter to create a frosty effect that mimics the beauty of winter.
Rich Jewel Tones
Deep, jewel-toned hues such as sapphire blue, ruby red, emerald green, and amethyst purple are another great option for holiday nails. These colors provide a sophisticated and elegant look, making them perfect for formal events or classy holiday dinners.
Holiday Nail Art Ideas
Once you’ve chosen your base color, it’s time to get creative with nail art. Here are some trendy and festive holiday nail designs that you can easily replicate at home or request at your nail salon.
1. Classic Red and Gold Stripes
For an elegant yet simple design, consider creating stripes of red and gold on your nails. You can use striping tape or freehand the lines for a chic look. This design works well with both matte or glossy finishes and is perfect for both casual and formal holiday events.
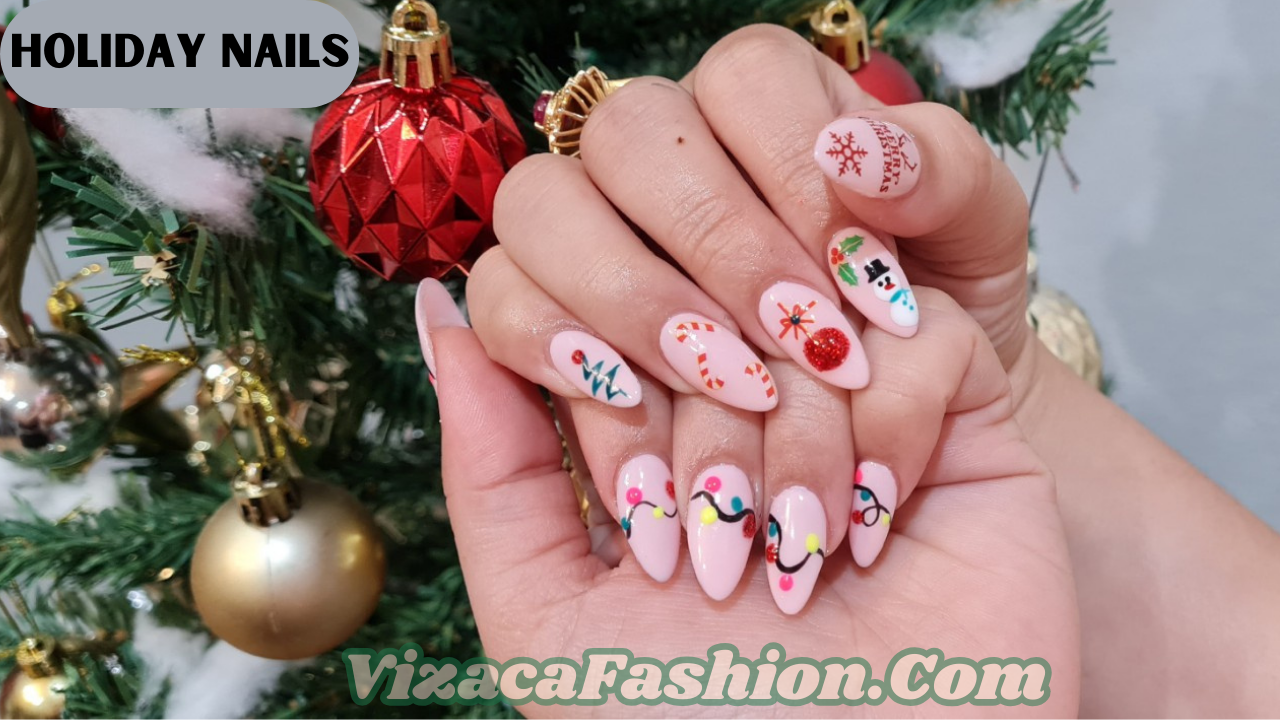
2. Christmas Tree Nails
A playful and creative option, Christmas tree nail art is a favorite for holiday nails. Start with a green base coat and use gold or silver for the tree’s “garland” and top it with a little star at the tip. This design can be done on every nail or as an accent nail to highlight one finger with festive charm.
3. Snowflake Designs
Snowflakes are synonymous with winter, making them a perfect addition to your holiday nail art. Use a white or silver polish to create intricate snowflakes on a blue, silver, or white base. You can use a fine brush or a dotting tool to create these delicate designs. For an extra touch, add some shimmer or rhinestones to give your snowflakes a sparkling finish.
4. Plaid and Checkered Patterns
Plaid is a timeless holiday pattern that works perfectly on nails. Using red, green, or black as a base, you can create plaid or checkered patterns by adding thin lines of contrasting colors. This design is great for Christmas but can be adapted to work for other winter holidays as well.
5. Holiday Glitter Nails
If you’re all about the sparkle, glitter nails are an excellent choice for holiday nails. Whether you opt for a full glitter manicure or just glitter tips, the added sparkle will make your nails shine. Consider using gold or silver glitter over a darker base for a more festive, glamorous look.
6. Snowman or Santa Nail Art
For a more playful design, why not try adding a snowman or Santa Claus face on one or two of your nails? These designs can be done with a simple dotting tool and some creativity. Paint the snowman’s face with white polish and use black for the eyes and buttons, while adding a tiny carrot-shaped orange nose. You can do something similar with Santa’s face, using red and white to create his iconic look.
7. Candy Cane Nails
Candy canes are another quintessential holiday symbol, and they make for an easy and fun nail art design. Use red and white stripes to create candy cane nails. You can either do a full set of candy cane nails or create a candy cane accent nail with a more neutral base color on the others.
Tips for Perfect Holiday Nails
To ensure your holiday nails look fabulous from the moment they’re done to the end of the season, follow these tips:
1. Start with a Clean Nail Surface
Before applying any polish or nail art, make sure your nails are clean, dry, and free of any old nail polish. Gently buff your nails to remove ridges, and trim them to the desired length. If you’re doing a DIY manicure, applying a base coat is a must to prevent staining and ensure longevity.
2. Use High-Quality Nail Polish
For the best results, choose high-quality nail polish brands. These polishes tend to last longer, dry faster, and provide a more even application. When it comes to glitter or metallic polishes, opt for ones with a good formula to avoid clumps or streaks.
3. Apply Thin Layers
To avoid smudging or chipping, apply your nail polish in thin layers. Let each layer dry completely before applying the next. This will help your nails stay intact longer and give your manicure a professional finish.
4. Use a Top Coat
Once your nail art is finished, seal it with a top coat to add shine and protect the design. A top coat also helps to prevent chipping and extends the life of your manicure. For added protection, consider using a quick-drying top coat if you’re short on time.
5. Take Care of Your Nails
After your manicure, take steps to keep your nails in top shape. Moisturize your cuticles with oil, avoid using your nails as tools, and wear gloves when cleaning to prevent your nails from getting damaged. Healthy nails will make your holiday nails look even better!
Conclusion
Holiday nails are a fun and festive way to embrace the season and get creative with your manicure. From classic designs like red and green stripes to more whimsical options like snowmen and candy canes, the possibilities are endless. With the right colors, art, and techniques, you can ensure your nails are holiday-ready and ready to shine at any celebration. Remember, the key to great holiday nails is a combination of creativity, patience, and the right tools, so let your imagination run wild and celebrate the holiday season in style.